
RainSpike Installation Guide
Install in Minutes. Let Rain Do More.
Place RainSpike near your plants to collect rainfall, guide it below the surface, and slowly deliver moisture directly into the surrounding soil.
Choose the right location
Prepare the soil
Insert the RainSpike
Settle the surrounding soil
Protect the collection area
Installation step #1
Choose the right location
Position RainSpike close enough to reach the plant’s root zone while leaving room for the roots to grow around it.
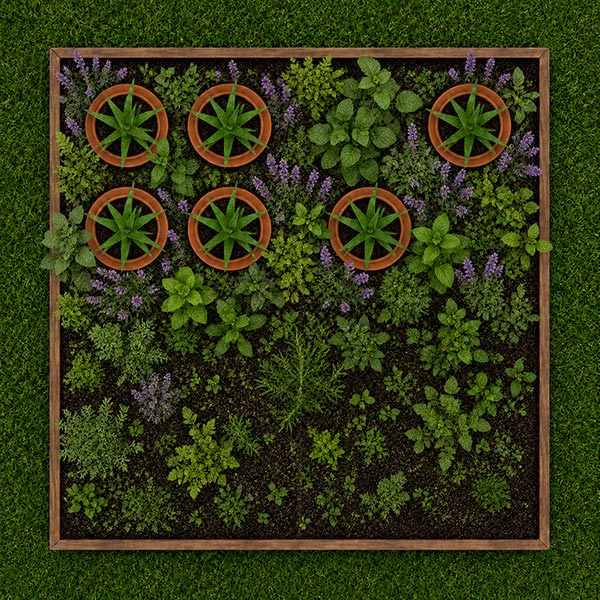
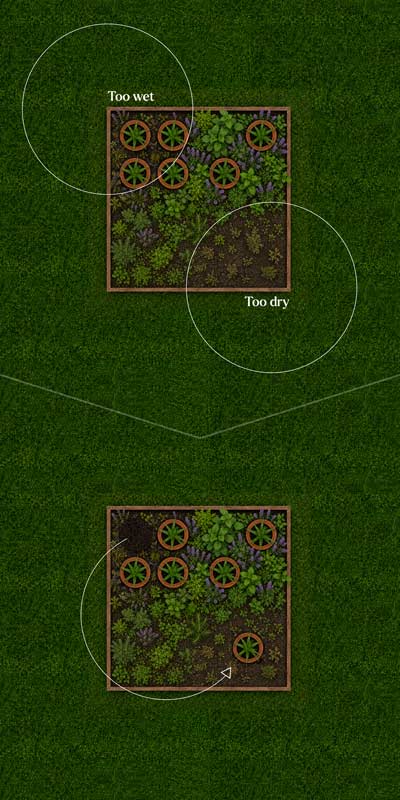
TIP: Place RainSpikes off-center
Start with an intentionally uneven layout rather than perfect symmetry, so you create a moisture gradient across the bed. That contrast acts like a built-in control group, making it easier to identify overwatering or underwatering and adjust RainSpike placement with confidence.
This gives you something extremely useful: comparison. Like a simple science experiment, your garden works best when you can compare one area against another. When part of the bed receives more RainSpike influence and another part receives less, it becomes much easier to see how your plants respond and whether the system is delivering too much water, too little water, or just the right amount.
That feedback helps you dial in the system over time. If the area closest to the RainSpikes is too wet, you can spread them out, move one farther away, or remove one. If the far edge of the bed looks too dry, you can shift a RainSpike toward that area or add another. Starting off-center makes the results easier to read, which makes future adjustments smarter and more precise.
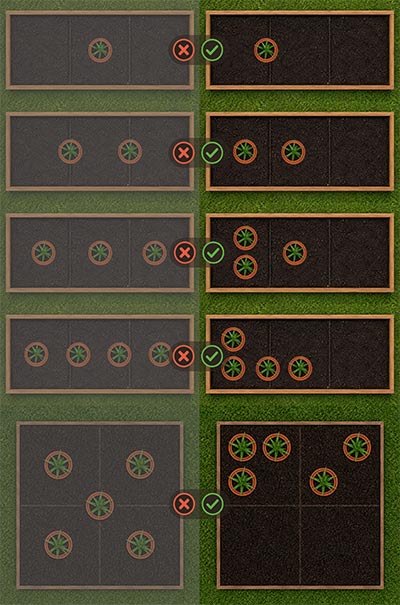
Place RainSpikes Asymmetrically
Position RainSpikes off-center rather than perfectly centered or evenly spaced. Natural moisture variation makes it easier to compare plant response and determine whether you need more coverage, less coverage, or a different arrangement.
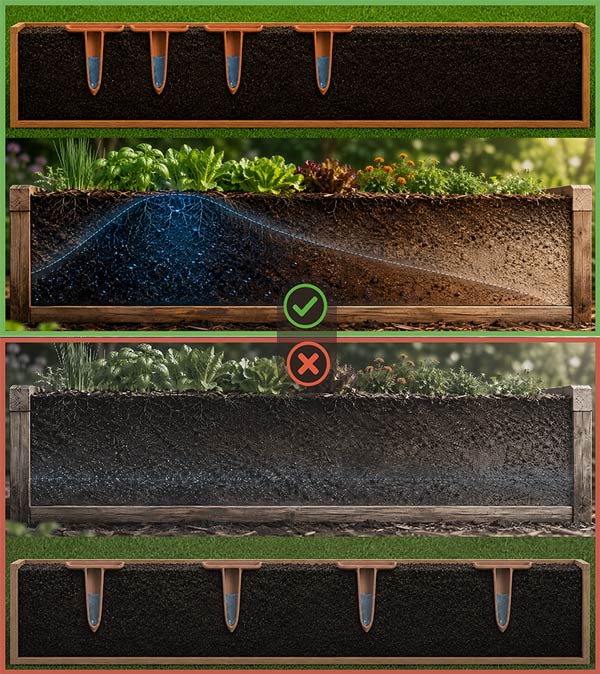
Create a Moisture Gradient
Concentrate RainSpikes more heavily in one area and leave other areas with less direct influence. The resulting wetter-to-drier gradient helps show how water moves through the bed.
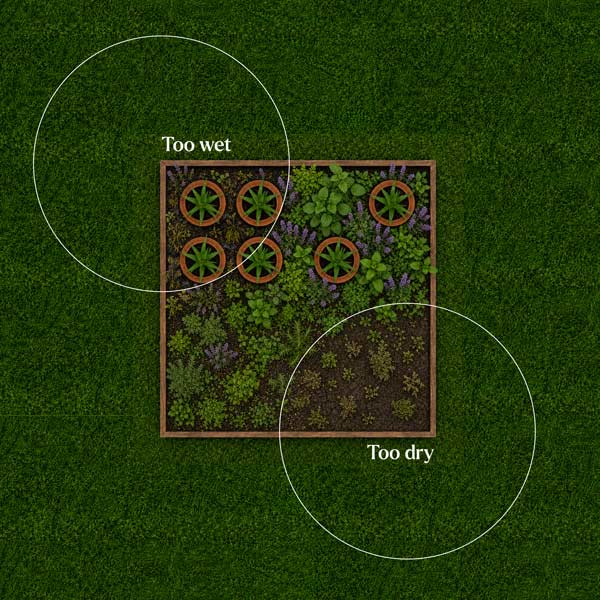
Compare Wetter and Drier Areas
Watch for areas that remain too wet near concentrated RainSpikes and areas that become too dry farther away. This contrast shows where adjustments are needed without changing the entire bed.
Adjust Based on What You Observe
Move a RainSpike from an overly wet area toward a drier area when plant growth or soil moisture shows an imbalance. Small adjustments can create healthier, more even growing conditions.
Why this matters
- It makes the system easier to read. A moisture gradient helps you see cause and effect more clearly than a perfectly even layout.
- It protects against overcorrecting. You can adjust based on visible results instead of guessing.
- It helps you find the right setup for your plants and soil. Every bed is different, and off-center placement gives you a better starting point for fine-tuning.
- It creates a built-in “control group.” Areas with less RainSpike influence help you compare plant health, vigor, and moisture balance across the bed.
Installation Step #2
Prepare the Soil
Loosen the soil and create a small starter hole. This helps the RainSpike slide into place without putting unnecessary pressure on the terracotta.
Installation Step #3
Insert the RainSpike
Lay the spike into the starter hole.
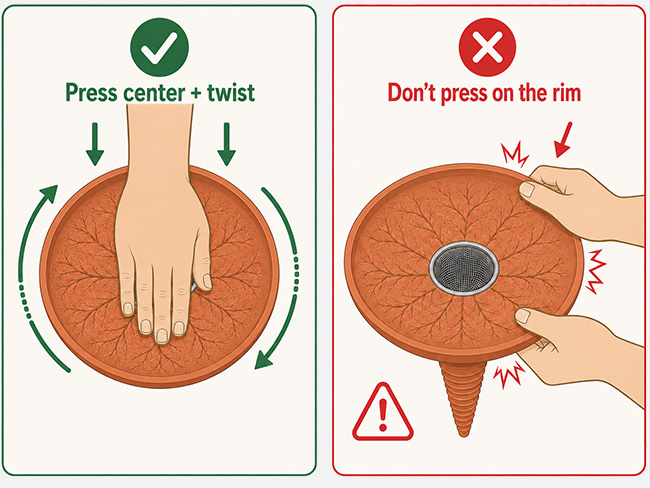
You may want to apply pressure and twist to penetrate through soil until the collection dish rests securely at ground level. Use your palm to only press down on the RainSpike dish’s center. To avoid breaking, do not apply pressure while gripping the outside rim of the dish.
Installation Step #4
Settle the Surrounding Soil
Firm the soil around the spike to remove large air gaps and create good contact between the porous clay and the surrounding earth.
Installation Step #5
Protect the Collection Area
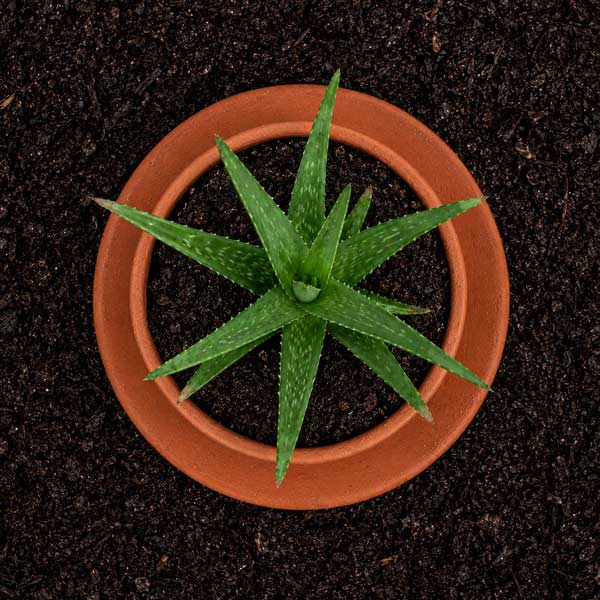
Add mulch, stones, a plant pot, or another suitable cover around or above the dish to reduce evaporation while leaving a path for rainwater to enter.
- Install RainSpike in moist or recently watered soil whenever possible.
- Avoid forcing the spike into hard, rocky, frozen, or heavily compacted ground.
- Keep the collection area free of soil and large debris.
- Check that water naturally flows toward the center reservoir.
- Use multiple RainSpikes to support larger plants, raised beds, or wider growing areas.